How to Transition from Snowboarding to Backcountry Skiing
April 18, 2020
The choice between learning to ski or snowboard is one that is often made a young age and has the potential to last a lifetime. Most parents only want to buy their growing kids one type of equipment, and once you are old enough to buy your own gear, switching can be a hassle. Anyone who’s invested years into learning one sport and developing friends to ski or ride with doesn’t want to suddenly become the one in the back of the pack. When riding at the resort, the capabilities of skis and snowboards are fairly evenly matched. However, for backcountry travel, skis have a few advantages of snowboards and split boards such as quicker transitions between climbing and downhill “modes” and increased maneuverability in flatter terrain. Switching between from snowboarding to skiing can seem like a daunting task, but over the last year I successfully made the transition in these basic steps.
Step 0: Overconfidence
The first, and most important, step to switching from snowboarding at the resort to backcountry skiing is a healthy dose of overconfidence. You can ride double blacks at Snowbird and took a few ski lessons when you were 5 years old right? You got this. Grab a rental touring setup and hit the trail with your buddies. How bad could it be? Make sure you forget to switch your books from “walk mode” to “ski mode” on your first run down to ensure that you never make the same mistake again. Get stuck upside down in some powder and then retreat to the skin track where you will yell “PIZZA PIZZA PIZZA,” as you slowly slide your way back to the car. Make sure you share this experience with good friends that will still talk to you after the experience. Now that you are aware that two sticks on your feet is not the same as one, and you haven’t vowed to never ski again, you are ready to move on to making progress.
Step 1: Do the gear shuffle
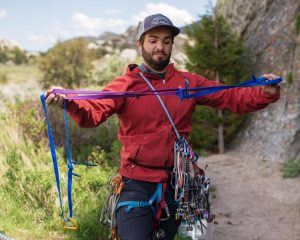
Now that you’ve tested the waters and have some basic level of commitment to learning to backcountry ski, its time to gear up. Although the downhill portion of backcountry skiing isn’t too far from riding in the resort, the uphill portion of the day creates a need for a different set of clothing. Going up hill on your own power generates much more heat compared to sitting on a chairlift. Starting the day with your normal resort setup of several layers with a big hard-shell over the top will have you sweating buckets in a matter of minutes. A layering system that allows heat to escape on the climb but also includes enough insulation and water resistance to keep you warm and dry after a powdery descent is essential. A basic setup with a base layer, a light fleece, a heavier insulation layer, and a mid-weight hard-shell with venting armpits is a good place to start for days when there is not a lot of snow in the forecast.
Step 2: Get up to go down
Backcountry travel inherently involves a separate set of skills from the ability to get down a mountain on groomed runs. First and foremost, you have to get up the hill on your own. Learning how skin isn’t all that complicated but it does take practice to get into a smooth sustainable stride. Nothing is quite as frustrating as getting to your first switchback that requires a kick-turn, and repeatedly sliding back down the hill as you fail to properly weight your skis. Practicing kick-turns on shallower hills that might not actually require them can be a good way to get used to the process of planting your downhill ski and twisting like a ballerina to point your uphill foot in the opposite direction without having to worry about what happens when (not if) you fall.
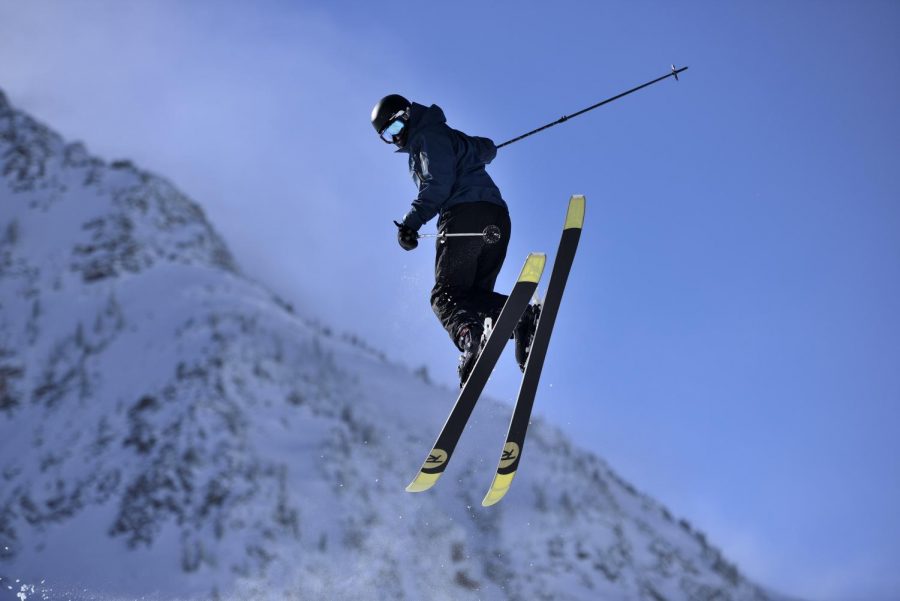
Step 3: Learn your turns
The number one key to success for making it back down the hill is controlling your speed. Plowing your way down with your skis forming a triangle is one option, but your legs will get tired quickly and you won’t have very much fun. Linking turns together on skis is somewhat similar to snowboarding, but with a few more moving parts. The general process begins with your skis pointed perpendicular to the main slope. To initiate a turn transfer most of your weight to the outside ski and lean the opposite direction. So for example, if you want to turn right; weight your left foot and lean down the hill to your right. Planting your downhill pole at the beginning of the turn can help with the transfer of weight as well. As your outside ski comes around, return to a 50/50 weight distribution between your skis and point both tips perpendicular to the slope once again. It will take some time to master coordinating both feet at the same time, especially for snowboarders who are used to steering with only the back foot. Again, the best way to practice on mellow terrain without consequences.
Step 4: Powder
One of the main draws of backcountry skiing is the seemingly unlimited access to untracked powder. However, skiing powder is challenging and can be very frustrating at first. The same basic turning technique as described above still applies, but balancing your weight more evenly between your skis can help keep one foot from floating to the surface of the snow while the other gets buried deep. Unlike snowboarding, where you can really just lean back and pull with your front foot, skiing requires a more balanced approach, where you lean forward and drive your skis through the snow rather than just floating on top.
Step 5: Respect The Skin Track
One of biggest surprises I encountered while backcountry skiing as a relative novice, was the difficulty of skiing downhill on a skin track at the end of the day. Many touring routes in the Wasatch follow summer hiking trails that begin in wooded areas and the most reliable way back to the car once you are below the tree line again, is to follow the path you took up. Depending on the density of trees and bushed in an area, and the depth of the snowpack, sometimes the only way to down is to directly skit the trench that gets formed by uphill traffic. This is can be challenging was the skin track develops into a hard packed grove without much room for speed scrubbing turns. Until you are comfortable making hard quick turns in a narrow area, you may have to resort to the old “pizza” technique to stay in control and avoid colliding with oncoming traffic from fellow uphill skiers. Something to keep in mind when choosing a touring route is not only the safety and difficulty of the high elevation terrain, but also the length and difficulty of the final decent back to the road.